
File Folder Tag Book
1 letter sized manila folder
2 pieces of coordinating patterned paper (or more depending on how you embellish it)
1 piece of coordinating cardstock
4 large eyelets
2 ft coordinating ribbon
1 brad
coordinating flowers or embellishments
1. cut folder in half along the fold so that you now have 2 halves
2. I used the half that's shorter so the measurements are for that half though you could use the other as well
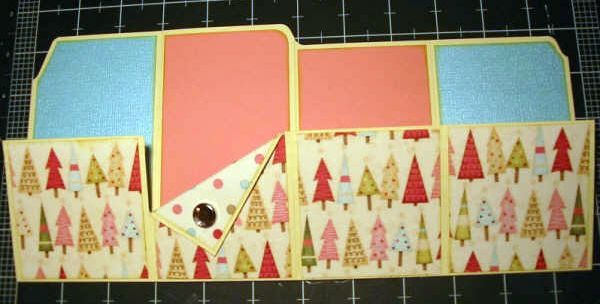
3. score 3 inches from the bottom horizontally and fold that section up.

4. fold the file folder in half (vertically)
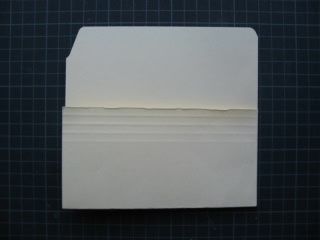
5. fold each of those halves in half again to give you 4 parts to your album
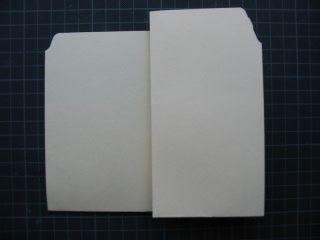
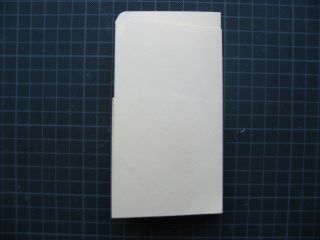

6. from cardstock (blue in mine) or a patterned paper cut the following sizes:
2 ¾ ” x 5 ½” (trace and trim left corner)
2 ¾ ” x 5 ½”
2 ¾ ” x 5
2 ¾ ” x 5 (trace and trim right corner)
Adhere these pieces to sections as shown in photo
7.Cut the coordinating piece of patterned paper (2 ¾” x 27/8”) that you're going to fold over and attach it to the inside bottom panel second from the left.
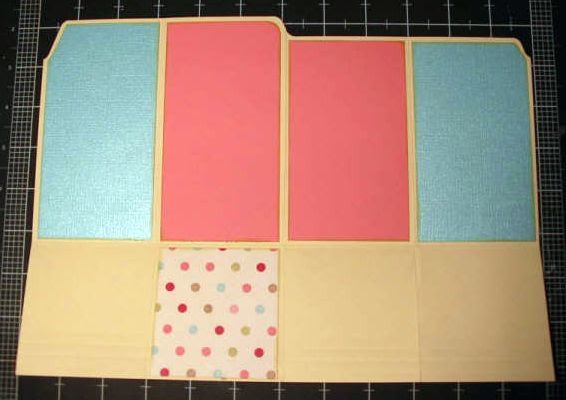
8.From patterned paper (little trees in mine), cut 4 pieces sized at 2 ¾” x 2 7/8”
Adhere these pieces to front panels as shown in photo
9. fold your album in half and, using a Cropadile or some other eyelet tool, punch a hole through all 4 layers of your album (front, back and the 2 layers of the folded up piece).
10. Decorate the front of your album as you wish.
11. Set large eyelets into the 4 holes that you've punched (so that the insides of the eyelets will face each other on the inside and be hidden). Thread ribbon around album.
12. Decorate the inside of the album however you want!
13. cut tags (or pictures) the following sizes from cardstock:
1 ¾” x 5 ¼”
2 ¼” x 5 ¼”
2 ¼” x 4 ¾”
1 ¾” x 4 ¾”
(The width of 2 is smaller because of the eyelets you set.)
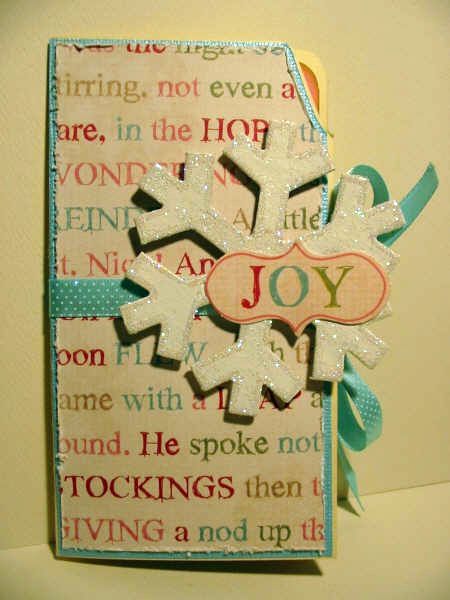
Hope you try it and I can see what you've created!
This idea originally came from a couple of people:
Taylor VanBruggen
Kristina Werner
Please feel free to ask questions or clarify anything that doesn't make sense to you!
Cheers,

4 comments:
This is so cute! I am going to have to try this!
Love your sample TFS
very cute Colleen!
great one
Post a Comment